Discovering the beauty of mehndi, or henna, is like unveiling a vibrant world of artistry that has captivated cultures for centuries. Whether it’s for a wedding, festival, or simply an expression of self, the intricate designs tell unique stories that resonate with tradition and creativity. However, when it comes time to remove this temporary adornment, the process can sometimes lead to confusion or concern. That's where this guide comes into play—offering you a safe and effective approach to celebrating your skin while ensuring its health.
In this guide, we will unveil essential techniques and expert tips for removing mehndi safely without compromising your skin’s integrity. With an emphasis on natural methods, we’ll explore everything from household ingredients to gentle application techniques that will leave your skin clean and refreshed. Get ready to dive into a world of possibility and learn how to gracefully transition from stunning designs to your natural glow.

Mehndi: The Art of Henna Body Painting is an illuminating journey into the rich history and techniques behind this beautiful form of body art. With detailed instructions and stunning visuals, this guide celebrates the cultural significance of henna while providing insightful tips for application and removal. Perfect for beginners and seasoned artists alike, this book allows readers to express their creativity while celebrating the traditions that shape the world of henna artistry.
Preparation Steps
To effectively and safely remove mehndi, it is crucial to start with a comprehensive preparation process. First, assess your skin's sensitivity by performing a patch test. Apply a small amount of the mehndi remover solution, such as coconut oil or a commercial henna remover, on a discreet area of your skin, like your wrist, and wait for at least 24 hours. This step helps identify any potential allergic reactions and ensures the safety of the method chosen for removal.
Next, ensure that the area with mehndi is clean and dry. Gently cleanse the skin with a mild soap and water, then pat it dry with a soft towel. Gather all necessary supplies before you begin the removal to create a seamless experience. Helpful items include:
- Coconut oil or olive oil - These natural oils effectively help in breaking down the henna stain.
- Cotton pads or balls - Essential for applying the oil or remover to the skin.
- A gentle scrub or exfoliating glove - Useful for further helping lift the henna while being careful on the skin.
- Plastic wrap - Can be used to cover the area once the oil has been applied, enhancing absorption.
Ensuring that you have all these supplies ready not only streamlines the process but also contributes to more effective mehndi removal. Make sure to work in a well-lit area to easily see what you are doing, enhancing both safety and efficiency.
- Wear gloves if your skin is particularly sensitive or if you prefer to avoid direct contact with the remover.
- Stay patient throughout the removal process; it might take multiple attempts to fully lighten or remove the stain.
Application of Oil
Applying oil to the mehndi area is a highly effective method for removing henna designs from your skin. Both olive oil and coconut oil work well for this purpose, as they not only help break down the dye but also nourish the skin. Start by selecting your oil of choice and pouring a generous amount into your palm. A tablespoon is usually sufficient to ensure full coverage of the mehndi design. Spread the oil evenly across your fingertips.
Gently massage the oil into the henna design, ensuring you cover each area of the mehndi completely. Use circular motions to help lift the dye from the skin. The warmth from your fingers can aid in this process, making the dye easier to dissolve. Continue to massage the oil into your skin for several minutes, allowing the oil to penetrate deeply. Rinse with warm water afterward for best results. To enhance the effect, you may consider repeating the process a couple of times a day until the design fades to your satisfaction.
- Choose high-quality olive or coconut oil for the best results.
- Make sure to cover the entire mehndi area with oil for even fading.
- Use gentle pressure while massaging to avoid irritating the skin.
Using Scrubs
Removing mehndi effectively requires the right techniques, especially when using scrubs. Natural scrubs can be made from common kitchen ingredients or you can opt for commercial exfoliating scrubs. For a simple yet effective natural scrub, consider using a mixture of sugar and lemon juice. To create this scrub, combine two tablespoons of sugar with one tablespoon of fresh lemon juice in a small bowl. Mix well until you have a grainy paste. The sugar acts as an exfoliant, while the acidity of lemon juice helps to lighten the henna stain.
To apply the scrub, first ensure that your skin is dry. Take a small amount of the sugar-lemon scrub and gently apply it to the area with mehndi. Use your fingertips to massage the scrub in circular motions, ensuring you cover the stained area thoroughly. Avoid using excessive pressure to prevent skin irritation; instead, let the exfoliating properties of the sugar do the work. Scrub for about 5-10 minutes before rinsing off with warm water. For those who prefer a commercial exfoliating scrub, select a product designed for sensitive skin, as this will reduce the risk of irritation. Follow a similar application process by applying the scrub, allowing it to sit for a few minutes, and then gently scrubbing in circular motions.
- Use a soft cloth or sponge to enhance the scrubbing process.
- Follow up with a moisturizer to keep your skin hydrated after exfoliation.
- Always perform a patch test if using a new scrub to ensure there’s no allergic reaction.
Soaking Method
To effectively remove mehndi, or henna, using the soaking method, you will require a few essential items: a bowl of warm water, some mild soap, and a soft washcloth. The warmth of the water will help to loosen the henna's hold on your skin, facilitating easier removal. Prepare your soaking area by filling a bowl with comfortably warm water—ensure that it is not too hot to avoid any skin irritation.
Once you've set up your soaking station, immerse the mehndi-stained area in the warm water for approximately 15 to 20 minutes. This duration allows the moisture to penetrate the henna and soften it for easier removal. You may choose to add a small drop of mild soap to the water for an additional cleansing effect. After soaking, gently scrub the area with a soft washcloth in circular motions to remove the mehndi residue. Be cautious during this process; you want to avoid excessive scrubbing which may irritate your skin.
- The use of mild soap aids in loosening the henna effectively.
- Warm water is essential for softening the mehndi.
- Soft washcloths prevent skin abrasions while scrubbing.
- Maintain a gentle approach to protect your skin from irritation.
Avoiding Common Mistakes
Removing mehndi can be tricky, especially when mistakes lead to skin irritation or prolonged staining. One common hurdle arises from the use of harsh chemicals. Many individuals turn to aggressive solutions like bleach or strong alcohol-based products, believing they will speed up the removal process. These substances can cause irritation, redness, or even allergic reactions on the skin. Instead, opt for natural remedies that are effective and gentler. For example, using lemon juice mixed with sugar can help exfoliate the skin gently while lightening the mehndi stain without damaging the surrounding area.
Another frequent mistake is excessive scrubbing of the skin in an attempt to remove the henna quickly. This can lead to micro-tears in the skin, resulting in discomfort and prolonged staining due to skin trauma. Instead, consider soaking the affected area in warm water or using a mild exfoliating scrub containing natural ingredients like coconut oil or baking soda. This gentle approach allows the color to lift without harming your skin. It’s also crucial to keep the skin moisturized during the process as hydration aids in the breakdown of the henna and can facilitate an easier removal.
- Use natural methods like lemon and sugar instead of harsh chemicals.
- Soak in warm water instead of scrubbing excessively.
- Moisturize the area to support effective removal.
Aftercare Tips
Once you’ve successfully removed mehndi, proper aftercare is essential to maintain skin health and appearance. Moisturizing the skin is a critical step following mehndi removal. Natural oils like coconut oil, olive oil, or jojoba oil can deeply nourish and hydrate the skin. These oils not only help soothe any potential irritation caused by the removal process but also create a protective barrier against environmental factors that may irritate the skin further.
In addition to moisturizing, avoid exposing freshly cleaned skin to direct sunlight for at least 24 hours. Sun exposure can lead to irritation, redness, or even a rash on sensitive areas where mehndi was applied. To protect your skin, consider wearing loose clothing that covers the area or applying a broad-spectrum sunscreen if you must go outside. Taking these precautions will ensure your skin stays soft and healthy after mehndi removal.
- Use coconut oil or olive oil to keep skin hydrated.
- Avoid harsh soaps or chemicals post-removal.
- Wear sunscreen to protect against UV rays.
- Consider a patch test before applying any new products.
Duration of Staining
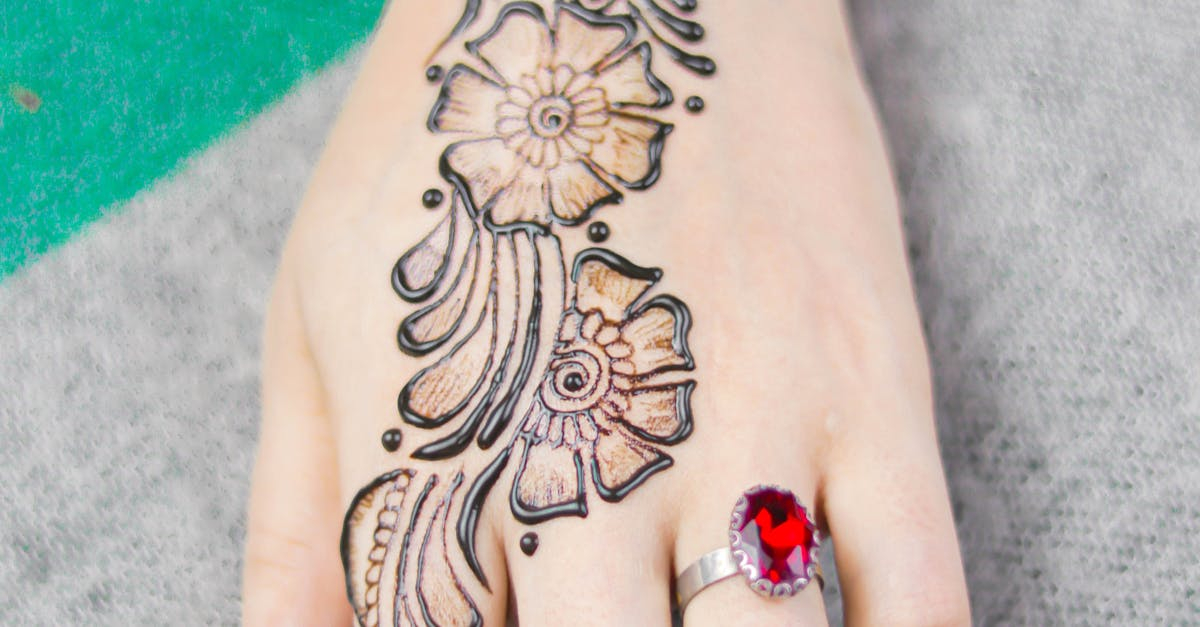
Mehndi, also known as henna, creates beautiful, intricate designs on the skin that can last anywhere from a few days to several weeks, depending on various factors. The natural duration of mehndi staining typically ranges from 5 to 15 days, with the darkest and most vibrant designs lasting the longest. The depth of the color is primarily influenced by the quality of the henna used, the aftercare, and the body part where the mehndi is applied. Areas with thicker skin, like palms and soles, tend to hold the stain longer than skin that is more delicate, such as the inner arms or face.
Several factors can affect the fading of mehndi, including skin type, exposure to water and sunlight, and the use of lotions or soaps. An important method to extend the lifespan of your design is to keep your skin hydrated and healthy. Use natural oils or moisturizers, avoid scrubbing the area, and limit the time spent in water to enhance the stain's longevity. By taking care of your skin, you can maintain the beauty of your mehndi for a more extended period.
- Quality of henna used
- Location of application
- Skin type and condition
- Aftercare routines
- Sun exposure and water contact
Related Products


Signs of Reaction
When applying mehndi, it’s essential to stay vigilant for any signs of an allergic reaction or irritation. While natural henna is generally safe for most people, certain additives or personal sensitivities can lead to adverse effects. Watching for symptoms can help you address problems early. Key signs to look for include:
- Redness: A brightening of the skin around the application area, this can indicate irritation or an allergic response. Monitor the area closely, especially if it appears more pronounced over time.
- Swelling: Noticeable puffiness or swelling at the site of application is another indicator that your skin might be reacting negatively. This can manifest as localized lumps or a more widespread swelling around the mehndi.
- Itching or Rash: Persistent itching or a rash that develops after henna application can be a direct sign of irritation. Take note of any changes in the skin texture, such as bumps or rashes that become itchy or red.
- Pain or Discomfort: If you experience warmth, tenderness, or pain in the area where mehndi has been applied, it may signal that your skin is reacting poorly. This feeling may accompany other symptoms like redness and swelling.
If you observe any of these symptoms, it’s crucial to take immediate action. Start by gently washing the area with mild soap and water to remove any residual henna. Avoid scrubbing, as this may exacerbate the irritation. If swelling or itching persists, consider applying a cool compress to the area to help soothe discomfort. Over-the-counter antihistamines may be beneficial in some cases. If symptoms worsen or do not improve, seeking medical advice from a healthcare professional is advisable.
- Be cautious with future mehndi applications; consider patch testing any new products on a small skin area.
- Keep track of any known allergies to natural ingredients as they might interact with henna.
Caring for Mehndi Designs
Mehndi, the art of henna body painting, produces stunning designs that can transform your look for any occasion. To ensure that your designs remain vibrant and last as long as possible, proper care during the staining process is crucial. The way you treat your mehndi can significantly influence its depth of color and longevity. Here are essential tips to help you maintain the beauty of your mehndi designs:
- Avoid Water Exposure: In the first 24 hours after applying mehndi, it's vital to keep the designs dry. Moisture can weaken the stain and prevent the henna from developing a rich color. Avoid activities like washing your hands, bathing, or swimming during this crucial time.
- Apply Oils: After the mehndi has dried (typically around 6-8 hours) and has been scraped off, applying natural oils can enhance the color. A mix of coconut oil or olive oil with a few drops of lavender essential oil can be applied gently over the designs. This not only protects the mehndi but also prolongs its wearability.
- Protect from Friction: Friction can cause mehndi designs to fade faster. Avoid wearing tight clothing or accessories that may rub against the area where mehndi is applied. If possible, keep your hands and feet unadorned for a few days to preserve the detailing of your designs.
Maintaining the brilliance of your mehndi designs requires attention to detail and a bit of extra care. By adhering to these recommendations, you can enjoy your intricate henna patterns for a longer period.
- Avoid direct sunlight: Excessive exposure to sunlight can cause your mehndi to fade. Keep your designs in shaded areas whenever possible.
- Limit contact with rough surfaces: Try not to scrub or rub the mehndi with abrasive materials, which can wear down the design and diminish its presence.
Preventive Measures
Preparation is key to removing mehndi effectively and with minimal hassle later on. Start with skin treatments such as exfoliation to create a smooth canvas for mehndi application. Gentle scrubs or exfoliators help slough off dead skin, allowing for a more even and long-lasting hue. This not only enhances the look but also minimizes the potential for unwanted staining beyond the desired design. It's important to ensure that your skin is free from excess oils and lotions, as these can interfere with the mehndi's adherence and may make removal harder.
Barrier methods are also essential in managing how mehndi interacts with your skin. Applying a light layer of olive oil or coconut oil around the areas where mehndi will not be applied creates a protective shield that prevents staining. This technique is particularly effective for intricate designs, as it helps to maintain the surrounding skin's natural color while promoting easier removal where needed. Additionally, selecting appropriate mehndi products is crucial; look for natural henna formulations free from artificial dyes, as they generally leave less residue behind, making removal simpler and more effective.
- Exfoliate your skin before applying mehndi for an even surface.
- Apply a barrier of oil to prevent unwanted staining.
- Choose natural henna without artificial ingredients for easier removal.
Why We Chose This Product
Choosing to create this how-to guide on removing mehndi stems from a deep appreciation for the art itself and the care involved in maintaining skin health. Mehndi is not just an adornment; it is a cultural symbol that deserves respect, and so does the skin it decorates. We recognize that efficient removal is key to ensuring that each application is as enjoyable as the last, enabling enthusiasts to share the beauty of henna time and again.
- Focus on natural ingredients that nourish rather than harm your skin.
- Step-by-step methods that anyone can follow with ease.
- Safety tips that empower users to enjoy mehndi without worry.
By bringing you valuable insights and practical techniques, this guide aims to elevate your henna experience, demystifying the removal process and allowing for creativity without hesitation.
Mehndi: The Art of Henna Body Painting is an illuminating journey into the rich history and techniques behind this beautiful form of body art. With detailed instructions and stunning visuals, this guide celebrates the cultural significance of henna while providing insightful tips for application and removal. Perfect for beginners and seasoned artists alike, this book allows readers to express their creativity while celebrating the traditions that shape the world of henna artistry.