Welcome to the mesmerizing world of mehndi, where art and tradition intertwine to create stunning designs on the skin. This guide will take you on a captivating journey, unlocking the secrets of intricate mehndi patterns tailored specifically for beginners. Whether you're preparing for a vibrant celebration or simply exploring a new hobby, learning the beautiful craft of henna body painting can be both fulfilling and fun.
As you dive into this guide, prepare to embrace the allure of creativity. From understanding the fundamentals of applying henna to mastering more complex motifs, every step is designed to enhance your skill set and build your confidence. All you need is a bit of patience and a flare of imagination to transform your artistic vision into reality.

Discover the exquisite art of Mehndi with our comprehensive guide designed for beginners. This guide, packed with valuable insights, techniques, and step-by-step instructions, empowers you to create intricate henna designs that mesmerize and enchant. Explore the rich history and cultural significance of mehndi while mastering essential skills to perfect your application technique, ensuring your journey into body art is both inspiring and gratifying.
With detailed illustrations and practical tips, you’ll learn how to mix henna, prepare your skin, and apply designs that reflect your personality. Whether for special occasions or personal enjoyment, Mehndi: The Art of Henna Body Painting serves as the perfect companion to unleash your creativity and express yourself through this beautiful, ephemeral medium.
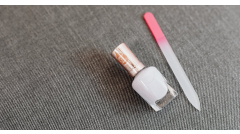
Essential Tools Needed
Creating intricate mehndi designs begins with choosing the right tools for the job. A quality application not only enhances your patterns but also ensures a pleasant experience. The primary items you’ll need include henna cones, applicator pens, and skin-safe henna powder. These tools form the backbone of your mehndi artistry, so fostering an understanding of each will amplify your skill set.
- Henna Cones: Look for pre-filled cones as they are incredibly user-friendly for beginners. The tip size is crucial; a finer tip allows for delicate work, while a broader tip is better for filling in larger areas. Ensure you check the expiration date and that the henna is 100% natural, without any harmful additives.
- Applicator Pens: These are excellent for more precise designs. Unlike cones, these pens can be refilled with henna paste. Select a pen with adjustable flow so that you can experiment with different line thicknesses. Choosing a pen with a comfortable grip will also make longer application sessions more enjoyable.
- Skin-Safe Henna: Invest in high-quality henna powder that is sourced from reputable suppliers. Fresh henna powder should have a vibrant green color and a strong, pleasant scent. To prep the henna for use, mix it with lemon juice and sugar to create a smooth paste. This mixture helps enhance the dye release and improve the stain quality on your skin.
In addition to the primary tools, having other accessories ready can greatly ease the process:
- Plastic Wrap: Use this to cover your designs after application to help the color develop more intensely.
- Essential Oils: Adding essential oils like lavender or tea tree oil to your henna mix can boost the stain's richness.
- Paper Towels: Keep these handy for quick clean-ups or to wipe excess henna off your fingers.
- Design Templates: As a beginner, having access to templates can guide your hand and help you practice complex patterns with ease.
Preparing the Skin
Before diving into the intricate artistry of mehndi, ensuring the skin is properly prepared is essential for achieving vibrant, long-lasting designs. Start with a thorough cleansing routine. Use a gentle soap or body wash that doesn't strip away natural oils, such as a glycerin-based soap, to eliminate any dirt and excess oils from the skin. Dry your hands or the area where you will be applying the henna completely to create the perfect canvas for your designs.
Following cleansing, exfoliation is crucial. This step helps to remove dead skin cells, allowing the henna to adhere better. A natural scrub can be made using sugar and olive oil for gentle exfoliating action. Apply the scrub in circular motions and rinse thoroughly. After exfoliating, it's important to hydrate your skin. Utilize a light, non-greasy moisturizer, like aloe vera gel or a water-based lotion, to ensure the skin is moisturized but not overly oily. An oily surface can interfere with the henna's ability to stain the skin. Completing this routine sets the stage for beautiful, intricate mehndi designs that leave behind rich, deep colors.
- Use gentle cleansers to avoid irritation.
- Exfoliate your skin for better henna adherence.
- Opt for non-oily moisturizers to prevent hindrance in staining.
Basic Mehndi Patterns
Creating intricate Mehndi designs is an enjoyable journey, especially for beginners eager to master the art of henna body painting. The foundation of beautiful Mehndi lies in basic patterns such as dots, lines, and spirals. These simple shapes can be combined into more complex motifs. Using quality henna paste, such as that in "Mehndi: The Art of Henna Body Painting," enhances the overall appearance and longevity of your designs. Here’s a guide on how to get started with the most basic motifs.
Simple Dots
Dots are the building blocks of Mehndi design. They add texture and interest to your patterns.
- Fill your henna cone with henna paste, ensuring a fine tip for dot application.
- Hold the cone like a pencil, with a firm grip.
- Gently squeeze the cone while bringing it to the surface to create dots of desired sizes.
- Practice creating dots of varying sizes—small, medium, and large—to gain control.
Straight Lines
Lines can form borders, frameworks, or parts of more intricate designs.
- Position your hand steadily over the paper or skin.
- Start from one point and maintain even pressure as you pull the henna cone towards the endpoint.
- For longer lines, practice before drawing on skin to ensure a steady motion.
Spirals
Spirals can add elegance and flow to your Mehndi designs.
- Begin by making a small dot where you want the spiral to start.
- From that dot, slowly move the cone in a circular motion, gradually increasing in size.
- Practice increasing and decreasing the spiral size for variety.
Maintaining a steady hand is crucial in creating these patterns. Here are some tips:
- Practice on paper to develop confidence.
- Keep your wrist relaxed and ensure a comfortable angle while drawing.
- Breathe deeply to calm any nerves and focus on the pattern.
- Consider resting your hand on a flat surface for added stability as you work.
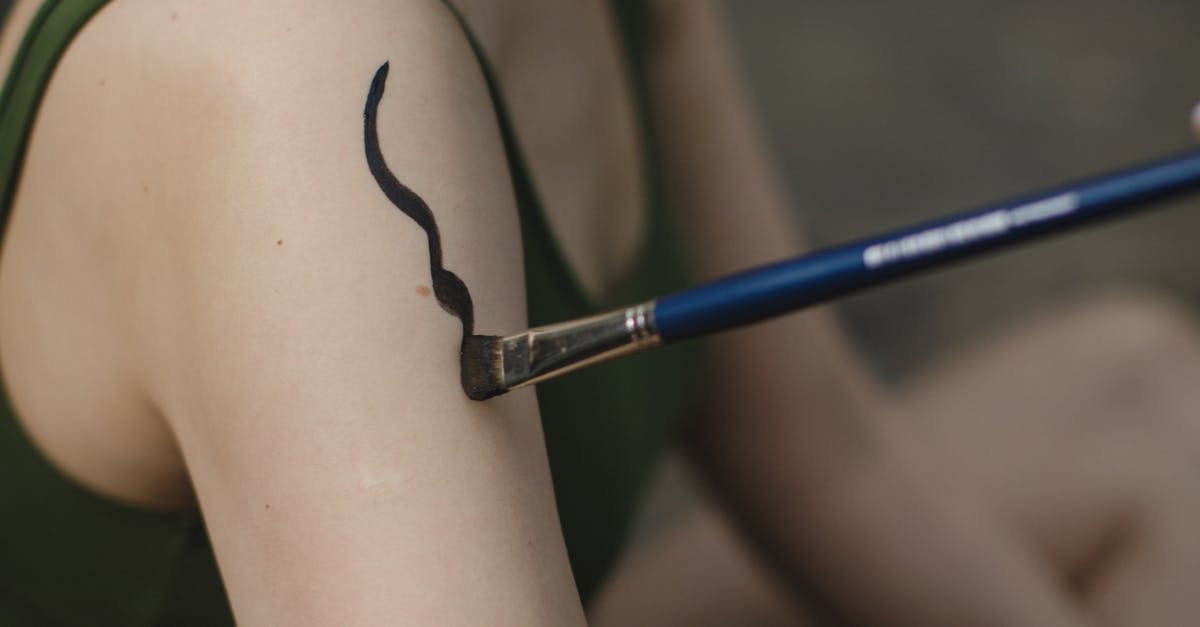
Applying Henna: Technique Tips
To achieve intricate mehndi designs, mastering the technique of applying henna is essential. Begin by holding the henna cone at a slight angle, typically about 45 degrees, to allow the henna to flow easily. This positioning helps in controlling the amount of henna that is dispensed. For fine, delicate lines, maintain a steady hand and a gentle pressure on the cone. If your goal is to create thicker lines or to fill in larger areas, apply slightly more pressure while ensuring the cone remains at the same angle to maintain a consistent flow.
Understanding how to manipulate pressure is key to producing various line thicknesses. You can generate flowy lines by using a light touch with the cone, letting the henna glide along the skin. Alternatively, pressing harder will yield thicker and more pronounced lines. Practice is vital. Create shapes like spirals and paisleys, adjusting the pressure as required. Experiment with the following techniques:
- Varying pressure to switch between thick and thin lines seamlessly.
- Allowing the henna to flow naturally for a graceful finish.
- Practicing on paper or plastic sheets before applying on skin to gain confidence.
- Using the right size of cone for your design complexity – a smaller cone for intricate details, a larger one for broader patterns.
Caring for Your Mehndi Design
After lovingly applying your intricate mehndi design, the real care begins to ensure that the rich, dark stain develops beautifully. The first few hours are crucial, as the mehndi needs to remain dry to achieve the best color. To start, avoid any water contact for at least the first 6-8 hours. This practice allows the henna to set properly, maximizing the stain’s potential.
For optimal results, consider the following care tips:
- Keep your hands and feet bundled in cotton gloves or socks to protect the mehndi from rubbing against surfaces.
- Refrain from washing your hands or using any kind of soap directly on the mehndi area. Even minimal water exposure can lead to a lighter stain.
- Avoid activities that may make your palms sweaty, such as rigorous exercise or exposure to humid environments.
Additionally, applying a mixture of lemon juice and sugar on the dried henna can help the color darken even further. This mixture acts as a sealant, ensuring that the design remains intact and vibrant. However, ensure that you apply it gently and avoid smudging the intricate patterns you have created. After the henna has dried, you can peel off the flakes gently, but do so with care to preserve your design.
- Limit exposure to direct sunlight, as UV rays can fade the mehndi quickly.
- Stay away from lotions or oils for the first 24 hours, as they can break down the mehndi and diminish its intensity.
Color Development Process
When working with henna, understanding how the dye develops and deepens over time is essential for achieving that rich, dark stain that is characteristic of intricate mehndi designs. Initially, henna paste appears greenish-brown when applied to the skin, but as it sets and interacts with the skin's chemistry, it undergoes a fascinating transformation. The primary factor affecting color development is the laws of oxidation and the time it spends on the skin. As the henna dries and oxygen penetrates it, the dye molecules oxidize, leading to a darker pigment. It is critical to allow the paste to remain on the skin for a sufficient duration, typically between 4 to 12 hours, maximizing the chances of a rich, dark stain.
A multitude of factors influence how henna ultimately appears on the skin after these reactions take place. For instance, an individual's skin type can impact the depth of color; oily skin tends to absorb henna better, yielding darker results. Heat and moisture also play pivotal roles. Hot environments can intensify oxidation, while moisture—either through applying a moist cloth or using a sugar and lemon juice mixture—can help the paste remain active longer. Here are some tips to enhance the color intensity:
- Apply henna in a warm space to encourage deeper penetration.
- Reapply henna paste after it begins to flake for sustained contact.
- Cover the design with plastic wrap post-application to trap moisture and heat.
- Use a mixture of sugar and lemon juice on the dried paste to keep it damp.
- Leave the henna on for an extended period before washing it off, ideally overnight.
Removing Henna Safely
Mehndi, or henna, has a beautiful quality of fading naturally over time, usually within one to three weeks, depending on various factors such as skin type and care practices. Understanding how to safely expedite the fading process can be essential, especially if you're looking to change your design or want to remove it for an upcoming event. One effective method to enhance the natural fading is by exfoliating the skin gently. Products containing alpha-hydroxy acids or gentle scrubs can encourage the henna to lift from the skin without causing irritation. Additionally, soaking the area in warm water can loosen the henna, allowing for easier removal.
It’s advisable to avoid harsh chemicals or vigorous scrubbing, as these actions can damage the skin while failing to effectively remove the mehndi. Instead, consider using natural oils like olive oil or coconut oil. Applying these oils can help dilute the henna, making it softer and easier to remove. Ensure you apply the oil generously and let it sit for a while before attempting to scrub with a soft cloth. To speed up the process collaboratively, you might combine these oils with exfoliating products for a multi-faceted approach:
- Exfoliating scrubs that contain sugar or salt.
- Natural oils to assist in breaking down the henna.
- Warm water or warm compresses to loosen the design.
When you notice the henna has started to fade significantly, this is the ideal moment to assist the process along. For those with sensitive skin, patience is key—allowing the henna to fade naturally should always be an option before applying any removal techniques will yield the best results without compromising skin health.
- Monitor your henna as it fades to determine the best time for removal methods.
- Use gentle, natural products that nourish the skin while aiding in removal.
Related Products


Common Mistakes to Avoid
When diving into the intricate art of mehndi, beginners often encounter a few common pitfalls. One frequent mistake involves applying the henna paste inconsistently. This inconsistency can lead to uneven saturation, resulting in patches that appear lighter or less defined than desired. To avoid this, ensure that you use a steady hand and apply the paste evenly. Avoid applying too much pressure on the cone as this may cause the henna to flow too quickly, leading to sloppy lines and designs. Instead, practice controlling the flow by adjusting the pressure on the cone tip.
Another common misstep is neglecting the importance of skin preparation. Applying mehndi on unwashed or oily skin can hinder the stain quality. Always start with clean, dry skin to maximize the henna's coloration and longevity. Additionally, ensure that the mehndi is fresh and preferably made with natural ingredients. Outdated or pre-mixed henna products might deliver underwhelming results. For optimal application, use henna paste that you’ve prepared yourself or purchased from a reputable source with clear ingredient labeling.
- Make sure to practice on paper first
- Test your henna on a small patch of skin to avoid allergic reactions
- Allow your design to dry completely before touching anything
- Avoid using water to cleanse the design before it's set
Incorporating Mehndi into Events
Celebrating special occasions with Mehndi (Henna) can elevate the entire experience, adding an artistic touch that resonates with cultural significance. For weddings, consider arranging a dedicated Mehndi corner where guests can choose from a variety of designs based on themes. For example, floral patterns could work beautifully for a spring wedding, while intricate geometric designs might complement a more contemporary celebration. Setting up an appointment system allows you to manage the flow of guests, ensuring everyone has a chance to partake without feeling rushed.
Festivals serve as another excellent backdrop for applying Mehndi designs. Establish a festive booth with vibrant decorations that reflects the spirit of the occasion, such as lights and traditional decor. Encourage group applications where friends and families can choose from matching or complementary designs. This can transform your space into a hub for creativity, laughter, and bonding as everyone engages in the application process, showcasing their newly adorned hands. A themed Mehndi night can also include activities like music and dance to keep the atmosphere lively.
- Arrange for professional Mehndi artists to showcase their skills live.
- Provide different Henna shades for variety and self-expression.
- Compile a lookbook of popular designs for inspiration.
- Incorporate sweet treats and refreshments to keep the mood festive.
- Consider offering a 'create your own design' area for guests to express their creativity.
Resources for Learning More
For beginners eager to elevate their mehndi skills, numerous resources can serve as guides and inspirations. One of the most accessible starting points is online tutorials. Websites such as YouTube host countless channels dedicated to mehndi artistry. Channels like Henna by Kiran and Mehndi Artist provide step-by-step instructions that cater to all skill levels, from simple designs to intricate patterns.
Books also offer valuable insights into the world of mehndi. "Mehndi: The Art of Henna Body Painting" by Rachna N. is an excellent choice, providing not only designs but also tips on application and care. Additionally, online platforms such as Udemy frequently feature courses focused on henna artistry, allowing for structured learning that aligns with personal schedules. Community workshops often host sessions led by experienced mehndi artists. Websites like Eventbrite list local events where beginners can practice in a hands-on environment, receive immediate feedback, and engage with others who share a passion for this art.
- YouTube channels focused on mehndi techniques.
- "Mehndi: The Art of Henna Body Painting" by Rachna N. for foundational knowledge.
- Online courses on platforms like Udemy to follow along at your own pace.
- Community workshops for hands-on practice and interaction with fellow enthusiasts.
Why We Chose This Product
Choosing to create a how-to guide on intricate mehndi designs stemmed from a personal passion for this unique art form. Mehndi is not just about the beautiful patterns; it also symbolizes joy, love, and celebration in various cultures. By sharing these techniques, I hope to inspire others to discover their creativity and appreciate the rich traditions behind this delightful practice.
- Unique artistic expression
- Fun and enjoyable process
- Connection to cultural heritage
- Opportunity for social bonding
- Boosts relaxation and mindfulness
Learning how to create mehndi designs opens up a world of possibilities for anyone curious about art. This guide is crafted to give everyone a warm introduction to the enchanting realm of henna, making it accessible, enjoyable, and deeply rewarding.
Discover the exquisite art of Mehndi with our comprehensive guide designed for beginners. This guide, packed with valuable insights, techniques, and step-by-step instructions, empowers you to create intricate henna designs that mesmerize and enchant. Explore the rich history and cultural significance of mehndi while mastering essential skills to perfect your application technique, ensuring your journey into body art is both inspiring and gratifying.
With detailed illustrations and practical tips, you’ll learn how to mix henna, prepare your skin, and apply designs that reflect your personality. Whether for special occasions or personal enjoyment, Mehndi: The Art of Henna Body Painting serves as the perfect companion to unleash your creativity and express yourself through this beautiful, ephemeral medium.